Showing posts with label yoga school in India. Show all posts

Wednesday, March 13, 2024

Yoga Benefits of the Corpse Pose (Shavasana)

 Yoga Benefits of the Corpse Pose (Shavasana)

Etymology and origin 

The word Shavasana comes from two Sanskrit words “Śava”  means “corpse” and “Āsana”, means “posture” or “seat”. The alternative name of Savasana is  Mritasana which is also comes from two Sanskrit words “mṛta” means “death” and “asana” means “pose”.The earliest mention of the Corpse pose or Savasana is in the 15th century Hatha yoga Pradipika, which states in the context of a medieval belief system that “lying down on the ground supine, like a corpse, is called Shavasana. This pose eliminates tiredness and promotes calmness of the mind.

Shavasana or Corpse Pose is intended to rejuvenate your body, mind, and spirit. In this pose, the breath deepens, and the stress of the day is released. The yogi forgets all other thoughts and surrenders any psychological effort. While in Savasana or Corpse pose, yogis slip into blissful neutrality and reflect on the practice. Comfort is significant in the pose; the slightest point of discomfort can be endlessly distracting. Daily practice of Shavasana or Corpse pose is an excellent way to reduce stress and tension.

Holistic Yoga Benefits of Shavasana or Corpse Pose

  1. Daily practice of Shavasana or corpse pose may give you numerous benefits, which are very subtle and only fully recognized over time, as you make Shavasana a regular part of your practice. Its benefits are physical, mental, and spiritual – as you move into moments of full relaxation you expand your consciousness and enter into a state of harmony with all three.
  2. Shavasana is a good way to reduce anxiety and stress, which in turn can have a positive impact on a variety of health issues that are stress-related such as diabetes, cancer, and heart disease.
  3. It helps with sleep issues. If you have insomnia or wake frequently during the night, then you must practice Shavasana or Corpse pose before bed. As this pose helps you enter a state of calm and conscious peacefulness which can help you sleep better.
  4. Daily practice of Shavasana or corpse pose is a Natural way of regulating your immune and digestive systems. 
  5. Shavasana or corpse pose can help you to lower your blood pressure as the sympathetic system becomes more tranquil.
  6. If you add Shavasana in your daily routine, your Concentration and Memory will get improve – Just like how meditation is a result of focus and concentration, when you are actively focussing on each area of your body while you are in Shavasana, your mind automatically improves in its capacity for concentration and memory.
  7. If you are looking for a quick boost of energy, you can turn to Savasana or corpse pose anytime during the day for some of that instant energy. Just practising shavasana for upto 10 minutes can give your body an energy boost, and thereby, increases your productivity.
  8. Shavasana is the best Yoga Asana to relieve migraine and also helps you to get relief from severe and disabling tiredness or fatigue.

How to do Shavasana or Corpse Pose?  

Shavasana or Corpse Pose is both the easiest and the hardest of yoga poses; it may look easy, your body may be still, but where is your mind? 

If you Done this pose correctly, it will leave your mind calm and your body relaxed but energised, certainly not sleepy. So let’s take a look at the easy 13  steps for doing Shavasana or corpse pose correctly- 

Step 1: Begin with lying down position, Lie flat on your back, neck away from your shoulders, chin tucked in. Make sure that your legs are extended and slightly turned outward, hands a little away from the body, palms up. 

Step 2: Now Close your eyes and gently turn your attention inwards and start to breathe deeply. Spend a bit of time checking in with each part of your body, making sure every body part is relaxed. 

Step 3: Let your hips sink into the ground and soften your groins and lower back. 

Step 4: Also Let your shoulder blades sink evenly down into the ground and spread the collarbones.

Step 5: Gently Lengthen your neck and relax your head into the floor.

Step 6: Relax your legs and arms, allowing them to become heavy.

Step 7: Relax and sink your groins, pelvis, lower back and chest into the floor.

Step 8: Let Soften your tongue, jaw, the skin of the forehead. 

Step 9: Allow your eyes to sink into their sockets.

Step 10: Allow your breath to become smooth and slow.

Step 11: Remain in the pose for at least five minutes.

Step 12: Then eventually release the pose, exhale and slowly bring your knees into the chest. Roll softly to the right side, supporting your head on your right hand on the floor. Rest here for a while.

Step 13: Deeply Exhale again, push your hands into the floor to slowly lift the upper body. Sit up and take a moment to feel what it is to be totally relaxed.

Precautions or Contraindications of Shavasana or Corpse pose

Shavasana or corpse pose is considered to be absolutely safe and can be practised by anyone and everyone. However, there are few exceptions who can’t perform this asana- 

  1. If your doctor has advised you not to lie on your back, you must avoid this asana or you can do some modification like lie with your back on the floor, and rest your calves on the seat of a chair, with your thighs perpendicular to the floor.
  2. In case of practising this asana during pregnancy, it is advised to rest your head and chest on a bolster for comfort.
  3. Most importantly, people with psychiatric disorders should not attempt this pose without first consulting a physician or yoga expert.

Modifications FOR CORPSE POSE (SAVASANA)

The energetic intention of Corpse Pose or Savasana is relaxing and letting go, so for any reason if it’s hard for you to do that in the traditional posture, work toward a position that makes it more comfortable with props. Some frequent Savasana or corpse pose modifications include:

  • Putting your legs on a chair or a wall
  • Placing a bolster, pillow, or rolled-up blanket under your knees
  • Putting a pillow under your head or neck
  • Lying on your side with a pillow or block between your knees
  • Placing blocks or folded blankets under your arms to support your shoulders
  • Using an eye pillow or mask
  • Practicing under a blanket for warmth

Variations of Savasana or Corpse pose

The above mentioned modifications are just a taste of the many ways you can practice savasana or corpse pose comfortably. You can also do other alternative forms of the pose using different positions and different props to support your body for total relaxation.

Here are some variations you can practice savasana when lying flat on your back isn’t working for you.

  1. ELEVATED SAVASANA
  2. SIDE-LYING SAVASANA
  3. PRONE SAVASANA

The Bottom Line

The routine practice of Shavasana or Corpse pose allows a deep relaxation of body and mind. Shavasana is as important and fundamental as exercise and a balanced diet. Yoga equips the nervous system with new neuromuscular information. The corpse pose gives your body and minds the possibility to integrate this new information before you again devote yourself ourselves to your everyday life. Without Shavasana at the end of a yoga class, you can also skip the whole class. Without this integrative phase, in the end, you may lose all that your body and mind have learned during the class. For that reason, Shavasana is often referred to as the most important asana. However, one important thing to note is that you cannot fall asleep when you practice this pose. As this pose requires you to concentrate, and focus on your breath. When you are practising this pose, try to take deeper, and faster breaths. 

If you are keen to learn more about the yoga benefits of shavasana or corpse pose, you can visit our website.

Stay healthy, stay strong and get the best out of life.

Keep reading.

Source: https://shivholisticyogaschool.com/blog/yoga-benefits-of-the-corpse-pose-shavasana/

Visit: yoga school in India | Yoga Teacher Training In India | 200 hour yoga Teacher Training In India | 300 hour yoga Teacher Training In India | 500 hour yoga Teacher Training In India
Tuesday, January 16, 2024

Yoga for Sciatica

 Yoga for Sciatica

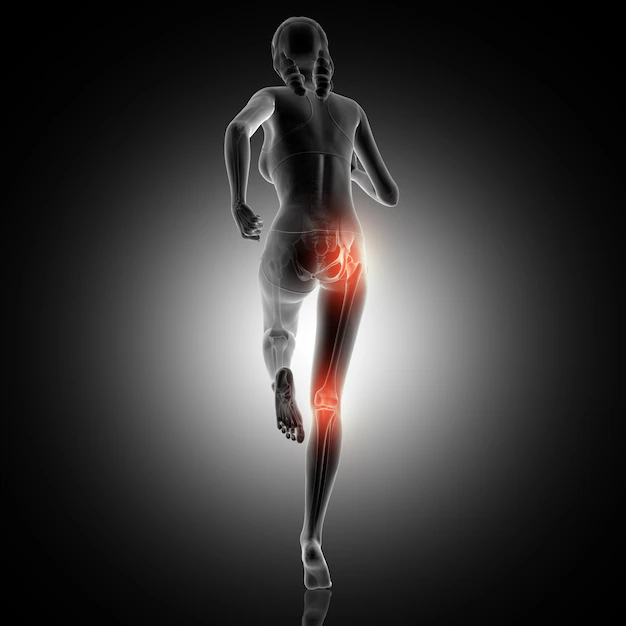
Living with sciatica can be a difficult experience since it is characterized by chronic pain and discomfort that spreads down the length of the sciatic nerve. Sciatica is pain that travels down the sciatic nerve from the lower back, down the hips and buttocks, and down each leg.

Sciatica can cause intense, shooting pain, tingling, or numbness, and it can have a substantial influence on an individual’s daily activities and quality of life. Below we have discussed some of the the causes and symptoms of sciatica.

Source:https://shivholisticyogaschool.wordpress.com/2024/01/16/yoga-for-sciatica/

Sciatica Causes:

  • Spinal disc herniation or bulging.
  • The narrowing of the spinal canal is caused by spinal stenosis.
  • Piriformis syndrome is a condition in which the piriformis muscle irritates the sciatic nerve.
  • Degenerative disc disease and age-related alterations in the spine.

Common Sciatica Symptoms:

  • Along the sciatic nerve route, you may experience sharp or shooting pain.
  • Tingling, numbness, or weakness in your leg or foot.
  • Prolonged sitting or standing causes discomfort.
  • Move the afflicted leg or foot with difficulty.

Yoga for Sciatica

Incorporating specific yoga positions into your program might be a game changer for dealing with sciatica. The sections that follow detail particular postures that focus on moderate stretches for the lower back, hip-opening motions, core strengthening exercises, and variations appropriate for varied degrees of flexibility.

  • Balasana (Child’s Pose):
    • Kneel on the mat, sit back on your heels, and stretch your arms out in front of you.
    • Lower your chest gently to the floor, stretching your arms out for a relaxing stretch along your lower back.
  • Eka Pada Rajakapotasana (Pigeon Pose):
    • Bring one knee forward and the opposing leg straight back from a tabletop posture.
    • Lower your chest over the front leg, allowing your hips and buttocks to stretch deeply.
  • Marjaryasana-Bitilasana (Cat-Cow Stretch):
    • Begin in a tabletop posture on your hands and knees.
    • Inhale, arch your back and elevate your head to form the Cow Pose.
    • Exhale and round your back, tucking your chin to your chest (Cat Pose).
    • This dynamic stretch mobilizes and massages the spine.
  • Pose of the Bound Angle (Baddha Konasana):
    • Sit with your legs bent and your feet together.
    • Hold your feet and let your knees slip outward, allowing your hips to expand.
  • Setu Bandhasana (Bridge Pose):
    • Lie on your back, bend your knees, and raise your hips to the sky.
    • To achieve a secure bridge position, engage your core, glutes, and thighs.
  • Forward Fold with Support:
    • Place your feet on a pillow and stretch your legs.
    • Reach forward and rest your hands on a block or the floor for a supported forward fold that will provide lower back relief.
  • Navasana (Boat Pose):
    • Sit on the mat, raise your legs, and lean back while remaining balanced on your sit bones.
    • For stability, extend your arms forward while engaging your core.
  • Hand-to-Big-Toe Supine Pose (Supta Padangusthasana):
    • Lie on your back and raise one leg to your sternum.
    • To gently stretch the hamstring without hurting the lower back, wrap a strap or belt over the foot.
  • Chair Pigeon Pose
    • Cross one ankle across the other knee while sitting on a chair.
    • For a sitting form of Pigeon Pose, gently press down on the crossed knee.

Modifications for People Suffering from Acute Sciatic Pain

  • Gradual Progression: Individuals suffering from severe sciatic pain should begin with mild yoga positions and work their way up to more advanced postures as their condition improves.
  • Pose Supported: Props like blocks, bolsters, and straps can give extra support during poses, decreasing pressure on the lower back and sciatic nerve.
  • Movement with Awareness: Mindfulness is essential. Practitioners should pay special attention to how their bodies react to each movement and avoid any positions that produce pain or discomfort.
  • Avoiding Agonising Poses: Deep forward folds and excessive backbends, for example, might aggravate sciatic discomfort. It is critical to modify or avoid certain positions to avoid additional aggravation.

Yoga for Sciatica: Health Benefits

  • Spinal Flexibility Increased: Yoga positions increase flexibility and movement along the entire spine, improving the health of the vertebral column.
  • Core Strengthening: Many yoga positions work the core muscles, especially those in the lower back, which leads to increased strength and stability.
  • Alignment of the Posture: Yoga promotes appropriate posture and awareness of body alignment, which decreases pressure on the spine and supporting tissues.
  • Relaxation of the Muscles: Yoga’s mindful breathing and relaxation practices help to total muscular relaxation, alleviating back tension and fostering a sensation of calm.
  • Circulation Improvement: Inversions, which increase blood flow and circulation, may help to reduce inflammation around the sciatic nerve.
  • Core and Glutes Strengthening: Yoga positions like Boat Pose and Warrior sequences help to strengthen the core and gluteal muscles, which offers important support for the lower back and sciatic nerve.
  • Reducing Stress: Stress can aggravate chronic pain, including sciatica. Yoga’s emphasis on breath awareness and relaxation methods helps to lower stress levels, providing a healing atmosphere.
  • Pain Tolerance Improvement: Yoga’s mindful practices build a heightened pain threshold, helping people to better handle the pain associated with sciatica.

Precautions and Safety Considerations Associated with Yoga for Sciatica

  • Personalized Counselling from healthcare experts: Consultation with a healthcare expert is essential before beginning a sciatica yoga practice. They can offer tailored guidance based on the nature and severity of the problem.
  • Identifying the Root Causes: Sciatica can be caused by a variety of underlying disorders, and a healthcare practitioner can assist in determining the underlying reason. This insight is critical for designing a yoga practice to meet the requirements and limits of each individual.
  • Care Coordination: Collaboration between healthcare experts and yoga teachers enables a more comprehensive and coordinated approach to sciatica management. This coordinated care reduces the possibility of aggravating pre-existing diseases.
  • Pay Attention to Your Body: Awareness of your limitations is essential in a sciatica yoga practice. Listening to the body’s signals and respecting its boundaries help to ensure a safe and long-lasting practice.
  • Gradual Development: Excessive exertion might result in greater discomfort and eventual difficulties. Gradual growth in practice intensity and length helps the body to adapt and respond favorably.
  • Striking a Balance Between Effort and Rest: It is critical to strike a balance between challenging oneself and allowing the body to relax. Incorporating rest days and gentle routines guarantees a long-term and caring approach to sciatica management.

Bottom line

Starting on the journey of yoga for sciatica is a personal and powerful decision. The practice provides a space for self-discovery and conscious healing via a comprehensive approach that extends beyond the physical.REPORT THIS AD

With this article we advise you to consider yoga as a supplement to your sciatica treatment plan, recognizing the potential for good improvement in both body and mind.  Integrating yoga into a sciatica care regimen provides a synergy of benefits, including increased physical strength, flexibility, mental resilience, and a profound feeling of self-awareness.

We hope you will let yoga heal you during your journey! If you liked this article then you should more such ones on our website and delve deep into the world of yoga!

Stay safe and healthy!

Namaste!

Thursday, December 28, 2023

A Step-By-Step Guide for Bridge Pose


A Step-By-Step Guide for Bridge Pose

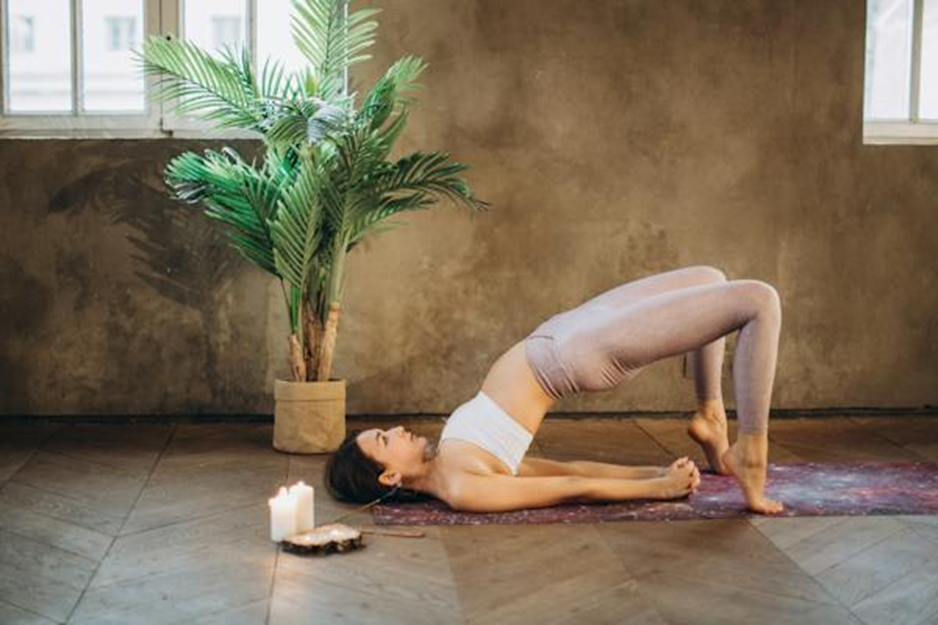
Bridge Pose, also known as Setu Bandhasana in Sanskrit, is a dynamic posture that can be customized for different levels of expertise, making it appropriate for beginners while also providing chances for refinement for more experienced practitioners.

The bridge symbol of connection and passage in spiritual and philosophical settings throughout civilizations. Similarly, the bridge Pose reflects the idea of connecting many components of the self – body, mind, and spirit. In yoga philosophy, the spine is commonly regarded as the bridge between the earthly and spiritual realms.

Source: https://shivholisticyogaschool.wordpress.com/2023/12/29/a-step-by-step-guide-for-bridge-pose/

The benefit of Bridge Pose

  • Back, glutes, and hamstrings are strengthened: Bridge Pose aggressively stimulates the muscles of the back, glutes, and hamstrings, which aids in the development of strength in these regions.
  • Improves spinal mobility and flexibility: A mild stretch along the spine promotes flexibility and mobility in this position. Regular practice might help to make the spine more flexible and agile.
  • Stability is achieved by engaging the core: Bridge Pose works the core muscles, particularly the abdominals. This involvement increases stability and helps to improve general core strength.
  • Neck and shoulder tension is relieved: The position allows for a gradual expansion of the chest, which can assist in easing neck and shoulder stress. It mitigates the negative consequences of extended sitting and bad posture.
  • Thyroid Gland Stimulant: Bridge Pose activates the thyroid gland, which is important in metabolic regulation. This can help with energy levels and a balanced metabolism.
  • Promotes Energetic Flow: The posture promotes the passage of prana, or energy, throughout the body. This can boost vigor and give a sense of renewal.
  • Improves Coordination and Balance: Bridge Pose, which involves balancing on the shoulders and activating the core, can help to improve general balance and coordination.
  • Activates the Chest and Heart Center: Bridge Pose energetically lifts and opens the heart center, generating a sensation of expansion. This can result in an increase in emotional well-being and a sense of lightness.

Step-by-Step Guide for Bridge Pose

  1. Beginning position: Begin by lying on your back with your knees bent and your feet hip-width apart and parallel. Make sure your arms are parallel to your body, palms facing down.
  2. Foot Positioning: Firmly press your feet into the ground, grounding all four corners, including the inner and outer borders. Place your heels directly beneath your knees.
  3. Pelvic Elevation: Inhale and elevate your hips to the ceiling, engaging your core. Roll your spine off the mat, articulating through the spine, one vertebra at a time.
  4. Shoulder Participation: To widen your chest, slide your shoulder blades down your back. Maintain parallel arms with hands pointing down.
  1. Fingers interlaced: You can also interlace your fingers beneath your back and stretch your arms. Roll your shoulders under and raise your chest towards your chin if interlacing.
  2. Position of the Neck and Head: Avoid any tension by keeping your neck long and relaxed. The gaze might be directed towards the chest or above.
  3. Hold and inhale: Hold the stance for a few breaths, allowing your chest to expand and your front to open.
  4. Release: Exhale as you slide your spine back down to the mat, gently releasing your hands.

Variation and Modification for Bridge Pose

●      Supported bridge pose: Place a yoga block beneath your sacrum for more support for a milder backbend.

●      Bridge with One Leg: Lift one leg towards the ceiling while keeping the other foot on the ground in a solid bridge posture.

●      Urdhva Dhanurasana (Wheel Pose): Explore the transition to Wheel Pose by straightening your arms for more experienced practitioners.

●      Support for the Wall: Bridge Practice Pose with your feet against a wall for extra stability and knowledge of your alignment.

●      The Dynamic Bridge: Include movement by raising and lowering your hips in a rhythmic pattern to improve the flow of the position.

●      Hands-Free Alternative: Once you’re comfortable with the posture, try hands-free variants by letting your arms rest alongside your body.

Precaution and Contradictions in Bridge Pose

  • Neck and spine problems: Individuals suffering from neck injuries or major spinal disorders should proceed with caution. Before trying Bridge Pose, contact a healthcare professional or an experienced yoga instructor.
  • Recent Surgical Procedure: If you’ve recently had surgery, especially on your back, hips, or knees, avoid or modify Bridge Pose until you get permission from your doctor.
  • Hypertension (high blood pressure): Backbends should be approached with caution by those with high blood pressure. To minimize severe strain, props or changes may be required.
  • Injuries to the shoulder or wrist: Individuals with shoulder or wrist ailments should use caution when doing poses that need them to support their body weight on their hands, such as Bridge Pose. Consider making changes to reduce stress in these areas.
  • Pregnancy: Pregnant women should contact their doctor before performing Bridge Pose, especially during the second and third trimesters. Modifications or other stances may be advised.

Important Tips for Bridge Pose

  • Warm-Up: Perform a thorough warm-up sequence that includes mild stretches for the spine, hips, and shoulders before trying Bridge Pose. Sun Salutations and other pre-exercise positions can gradually raise body temperature and improve flexibility.
  • Cooldown: After practicing Bridge Pose, take some time to calm down. Gentle stretches and relaxation postures, such as Child’s Pose or Supine Twist, can aid in the release of tension and the prevention of stiffness.
  • Breath Control: Maintain mindfulness of your breath during the warm-up, position practice, and cool-down. Deep, deliberate breathing aids relaxation and prepares the body for the demands of the position.
  • Hydration: Stay hydrated before and after your workout to improve overall health and muscular function.

Frequently Asked Questions about Bridge Pose

Is advanced flexibility required for Bridge Pose?

No, Bridge Pose may be modified to accommodate varying levels of flexibility. Modifications and changes make it suitable for practitioners of varied skill levels.

Can the Bridge Pose assist with lower back pain?

Bridge Pose helps alleviate minor lower back pain by strengthening the back muscles and increasing flexibility. Individuals suffering from chronic pain, on the other hand, should seek the advice of a healthcare practitioner before engaging in this practice.

What alterations may pregnant women make to Bridge Pose?

Pregnant women can practice Bridge Pose with adjustments, such as a lower lift or using props for support. However, before engaging in any yoga postures during pregnancy, it is critical to contact a healthcare expert.

How frequently should I perform Bridge Pose?

The frequency of practice is determined by the individual’s goals and level of comfort. Including Bridge Pose 2-3 times each week is a fantastic place to start.

Bottom line

As we end this article, we have concluded that Bridge Pose is a gateway to total well-being, not just a physical asana. If you have stayed with us till here then we invite you to embrace the Bridge Pose as a chance for self-discovery and thoughtful investigation.

You should approach this posture with openness and inquiry, whether you are a seasoned yogi or a beginner on your mat. We wish that your discovery of Bridge Pose be a joyful and fulfilling experience, helping you on your yoga path toward increased self-awareness, flexibility, and strength.

This was all! We hope you like reading this article! If you want to read more such ones then reach out to us on our website and delve deep into the world of yoga!

Stay safe and healthy!

Namaste!

Visit: yoga school in India | Yoga Teacher Training In India | 200 Hour Yoga Teacher Training in Rishikesh | 300 hour yoga Teacher Training In India | 500 hour yoga Teacher Training In India
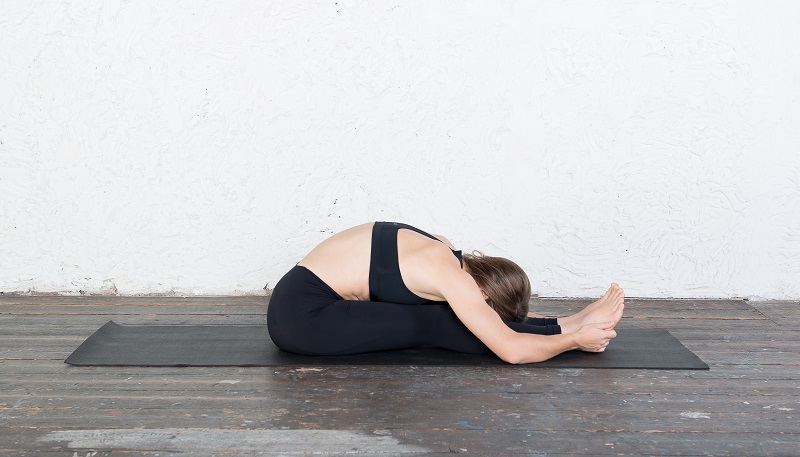
Seated forward bend pose for PASCHIMOTTANASANA

Seated forward bend pose for PASCHIMOTTANASANA The Paschimottanasana is a seated forward bending asana in hatha yoga and modern yoga as exe...